Monday, March 30, 2020

Fusion: How to Create Custom LOV in ESS Job

1. Go to Setup & Maintenance.
2. Search and select Manage Custom Enterprise Scheduler Jobs for <XXX>. Replace <XXX>
    depending on in what application you registered your ESS job. For example, in my case it is
    Manage Custom Enterprise Scheduler Jobs for Financial Common Applications.

3. Click on Manage List of Values Sources (1) tab.

4. Click on + icon (2).


5. Define new LOV as given below:

Field Name
Value
Application Name
Application Toolkit
User List of Values 
Source Name
Any name of your choice e.g. ReportsSupplierPVO
List of Values Source
Definition Name
oracle.apps.financials.payables.shared.publicView.ReportsSupplierPVO
Description
Any description of your choice


6. Click on Save and close.

7. Now you should be able to see this LOV while defining the parameters for the ESS job.


Please note:
• Attribute: this is what will be returned to the corresponding BI Report parameter.
• Display Attributes-Select Attribute: This is what displayed to the user.
• While defining parameters, please note that the sequence of the parameters are important.
In other words, ESS parameters are linked to BI Report parameters by position, not by name.

Fusion: Financial Reporting Studio Installation Steps


Follow the below steps to download the latest executable of FR Studio 

Navigation Steps to find executable in Fusion Applications.

Go to Financial Reporting Center
In the Right panel under Financial Reports, click on Open Workspace for Financial Reports
In the Workspace, click on Tools>Install>Financial Report Studio.

OR

Go to BI Analytics URL
In the left panel under Get Started, select Download BI Desktop Tools>Financial Report Studio


Fusion: Steps to Create BI Publisher Report

Go To Navigator-> Reports and Analytics -> Browse Catalog
It will open Business Intelligence Catalog screen where Report can be developed following below steps.

Step-1 : Create Data Model

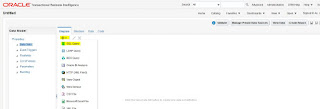
Click on “New” -> Data Model
Click on “New Data Set” -> SQL Query


Name : DataSet Name as DataSet1
Data Source : ApplicationDB_FSCM
Type of SQL : Standard SQL as Default value
Write your SQL query as below select * from po_headers_all

Click “OK”

And “Save” at the desired location.


Go To “Data” tab where we can select number of “Rows” to be displayed (max 200).
Click on “View” button to execute the SQL query of the Data Set

Data can be viewed as Tree View (XML) and Table View as well.

 Step 2 : Create Report/Layout

Click on “Export” button to get the XML and save to your Desktop using which Report Template (layout) can be built using BI Publisher

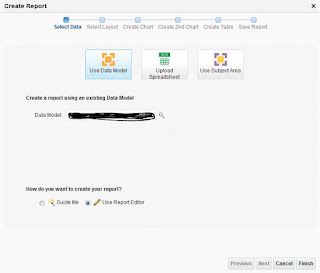
“Save As Sample Data” and “Create Report” option to upload the layout template.

“Use Report Editor” option and Click “Finish”.
Save at desire location

Click on “Upload“ option and give Layout Name (E.g. Output)
Select the Template file prepared using XML (Exported)

Select “Type” (E.g. RTF) and “Language” as English. Click “Upload”

Using “View Report” report output can be view as per the Templated designed.

Fusion: Import Tax Registration Number and Tax Classification Code to Suppliers/Customers


After Suppliers were migrated to a new environment, now the user must upload the Tax Registration to the suppliers, but the worksheet (SupplierImportTemplate and SupplierAddressImportTemplate) does not have a column for this information.


It is suggested to use the Rapid Implementation feature for uploading the Registrations to the Suppliers.

Following are the steps to be performed by the user having the TAX_MGR_OPERATIONS role.


1. Navigate to the Setup and Maintainance Task "Manage Tax Regimes" and click on "Rapid Setup Spreadsheets" tab on the page.

2. Click on "Download Tax Implementation Workbook", which will download the TaxImplWorkBookTemplate.xlsm"

3. Open the Workbook and populate the data in the "Tax Registrations" sheet to upload the Registrations for the Third Party/Third Party Site.


4. For Tax Classification Code populate the data in the "Party Tax Profile Controls" (initially it is hidden, we have to unhide this sheet) sheet to upload the Classification for 

Third Party or Supplier or Customer (sites) wherever is required.

5. Once the data is entered, click on the "Generate csv" button on the "Tax Impl Workbook Instructions" sheet and save the generated zip file.

6. Click on "Upload Tax Implementation Workbook" link under "Rapid Setup Spreadsheets" tab on the "Manage Tax Regimes" page and upload the zip file generated in step(4).

7. Once the file is uploaded a Job gets submitted. Review the status of the Job under "Monitor Upload and Download Processes" tab on "Manage Tax Regimes" page.

8. Once the Job is successful, check the Registrations that have been uploaded from the Supplier page.


Above steps are explained for Supplier case, the same steps can be followed for Customer as well


Reference:

How To Mass Load 'Tax Registration' To Suppliers? (Doc ID 2236634.1)